HP ProLiant DL Disclaimer
Note: This document was last updated 13 April 2020 and supersedes all previous versions.
Contents
DL360/380/580 G6/G7/Gen8/Gen9/Gen10
ICE-PIC series cards are NOT supported on HP DL360/380/580 G6/G7/Gen8/Gen9/Gen10[1] servers under the default BIOS settings. Operation of the cards under the default BIOS settings VOIDS THE WARRANTY.
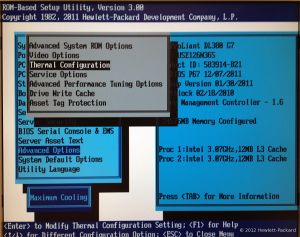
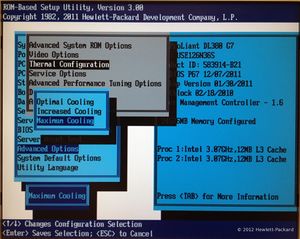
For proper operation in an HP DL360/380/580 G6/G7/Gen8/Gen9/Gen10, a minimum 750W power supply must be installed, and thermal configuration must be set to “MAXIMUM COOLING” in the BIOS. Operation under “optimal cooling” or “increased cooling” is not supported and VOIDS THE WARRANTY.
- ICE-PIC Long cards must be installed in the top slot of the riser for G6/G7/Gen8 servers.
- ICE-PIC Long cards are NOT SUPPORTED in Gen9/Gen10 servers as there is insufficient rear retention provided.
- ICE-PIC Regular cards may be used in HP DL380 Gen9/Gen10 servers IF AND ONLY IF the following conditions are met:
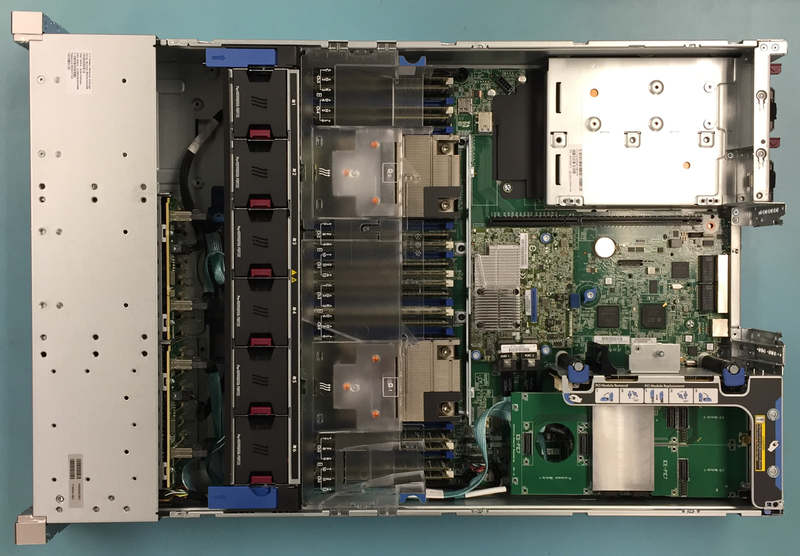
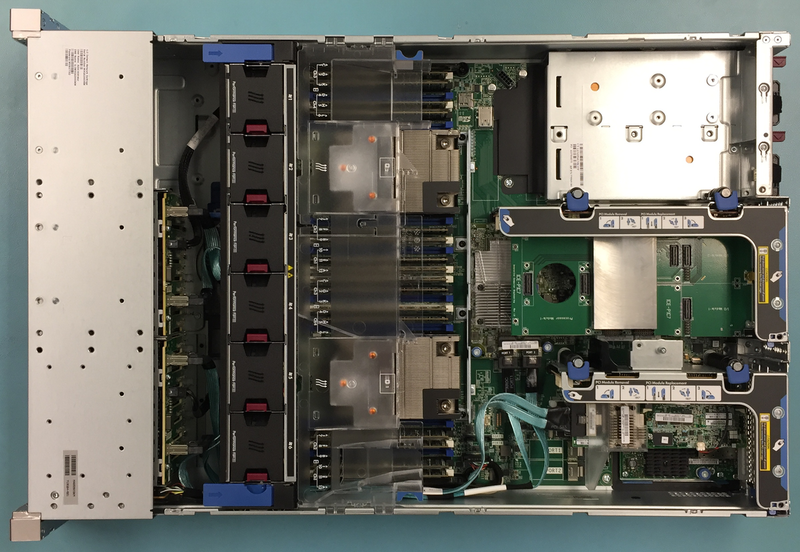
- ICE-PIC cards may only be installed in the middle PCIe slot of each riser, slots #2 and #5 (See Fig. 1.1-1.5 below).
- The stock closed rear panels must be replaced with increased airflow panels (Fig. 1.1).
- In the BIOS, the fan speed must be set to MAXIMUM COOLING
ICE-PIC6 or earlier series DSP cards are NOT supported in HP DL Gen9 servers either internally or in external expansion chassis; however, the ICE-PIC7 is fully supported both internally and in external expansion chassis with the proper setup.
Gen9 Figures
BIOS Setup Instructions
The process is the same for all these servers; however, the firmware versions are different. (See next section for versions).
1. Download the appropriate ROM firmware, and flash the BIOS ROM.
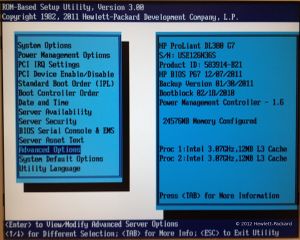
2. Enter ROM-Based (BIOS) setup utility.
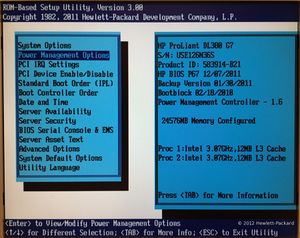
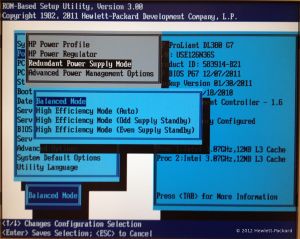
3. Select "Power Management Options" > "Redundant Power Supply Mode" > "Balanced Mode". (See Figs. 2.1-2.2; click for larger image.)
4. Return to main menu.
5. Select "Advanced Options" > "Thermal Configuration" > "Maximum Cooling". (See Figs. 2.3-2.5; click for larger image.)
BIOS Firmware Versions
G6
ROMPaq firmware v. 2011.05.05 (A) (6 Jul 2011)
For the DL380p G6, this can be downloaded here (SP53748).
G7
ROMPaq firmware v. 74394 (7 Dec 2011)
For the DL380p G7, this can be downloaded via FTP here (CP016638.scexe).
Gen8
ROMPaq firmware v. 2013.03.01 (A) (26 Mar 2013)
For the DL380p Gen8, this can be downloaded here (SP61235.exe)
Notes
- ↑ © 2017 Hewlett-Packard Development Company, L.P. All rights reserved.


